वीरभद्रासन
Vīrabhadrāsana: Virabhadra = the name of the mighty Warrior.
The set of Warrior poses (Warrior I, II, and III) is the basic one to build the necessary strength and stamina for better balance and proper posture. It works not only with the lower part of the body but with the shoulder girdle too.
Yogis believe that your spirit grows stronger as you master the Warrior pose. The Warrior awakes your inner strength and turns you into a powerful warrior.
Today, we’ll explain how to do Warrior II, which is, as the number suggests, the second variation of the Warrior pose.
How to Get Into It
The starting point for Warrior II can be in the Mountain pose or Downward facing dog. No matter how you enter the Warrior II pose, it incorporates well in any sequence and works fine if you practice it isolated. The choice is up to you. Depending on your yoga instructor and the yoga school you join, you will be doing Warrior II in static and dynamic variations in a regular yoga class.
First, let’s see how to do it from the Mountain pose.
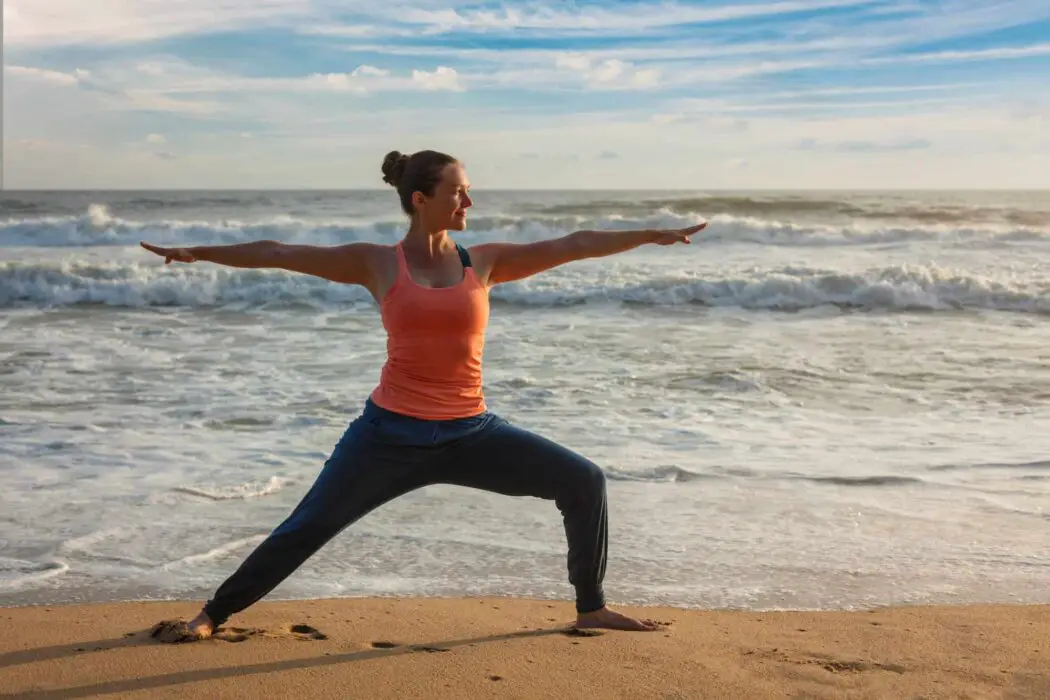
- So, when you’re in a Mountain pose at the beginning of your mat. Make a wide step (or a jump) with your right foot to the right side. Your torso faces the left side of the mat.
- As you jump or step, open your arms and stretch to the sides. Keep hands in line with shoulders with palms facing down.
- Rotate the left foot inwards, but mind keeping both heels on one line. In the end, your right big toe looks to the front; the left foot toes are at an angle of 45° to the middle line of the mat.
- Next, bend your right knee so that the thigh is parallel to the floor. Don’t push the knee too forward; keep it right above your heel to prevent knee injuries. Tip: for proper alignment, check if your right ankle and thigh form a 90° angle. Adjust the knee and foot position if necessary.
- While keeping the torso in the same position (explained in p.1), turn your head to the right and slide the gaze along the line of your right palm.
- Hold the Warrior II pose for at least 1 minute or more. After that, release and repeat to the left side.
The second option is to come into Warrior II from a Down dog. This is a common variation that is used in many sequences.
- When you’re in a downward-facing dog, exhale and make a wide step forward with your right leg towards your hands. Align the knee and ankle as explained in p.4 above.
- Then, as you inhale, rise hands and torso. Reach the right arm forward to the right and the left one – open to the left.
Warrior I Pose (Virabhadrasana I)
Benefits
Warrior II builds strength in legs, thighs, and ankles.
It corrects the tension in soles and thus improves the posture and walking patterns. This, in turn, adds to the spine health and reduces the risk of back pain.
This pose helps open the pelvis and hips. In addition, the asana activates the blood circulation around the hips joints.
As for the upper body, Warrior II builds stronger arms and shoulders. In addition, it strengthens major back muscles (Latissimus dorsi, teres major, and pectoralis major).
Precautions
Warrior II should be practiced with caution if you have joint issues or recent surgery.
Watch out for knee injuries and avoid doing this asana or practice under supervision.
Modifications
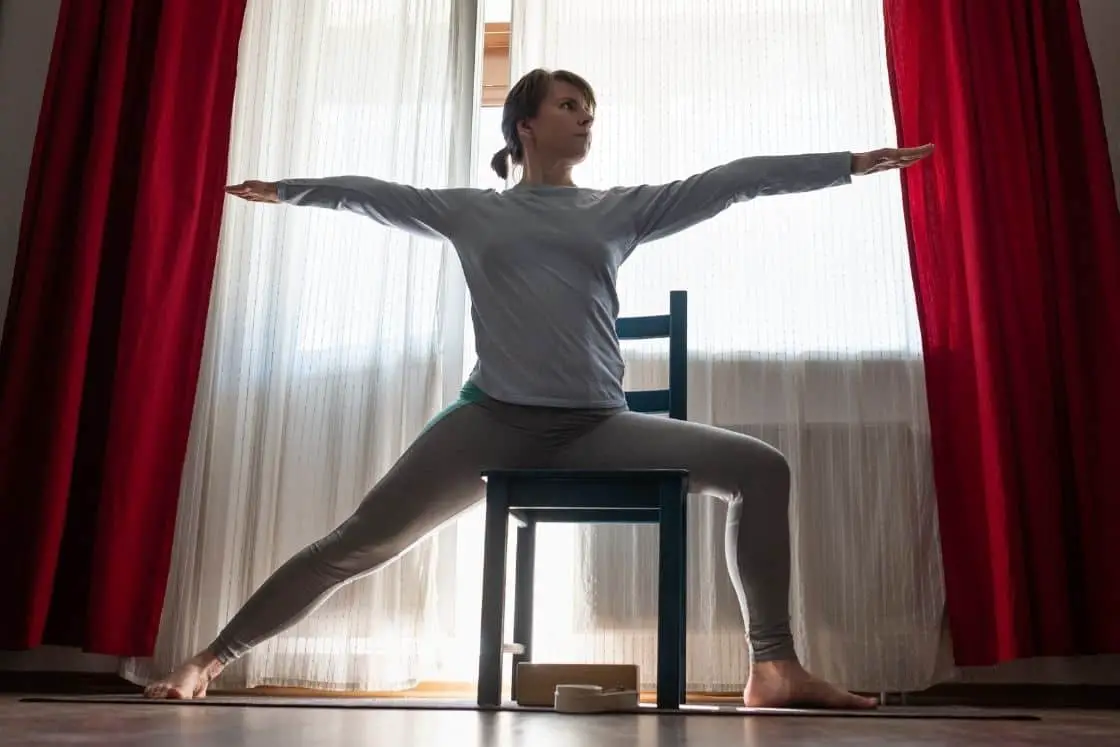
Beginner: Before your body is ready to hold the Warrior II, use props for the practice. This can be a folding chair or a few blocks under the front leg. For example:

Alternatively, you can use the wall and a block to teach your body to hold the knee properly. Get a block and perform the Warrior II form close to the wall. Use the bent leg to press the block firmly to the wall and feel how your thigh is burning. Enjoy!
Advanced: When your legs and back are strong enough to hold the Warrior pose for 3-5 breaths, you can try doing dynamic variations.
<iframe width=”560″ height=”315″ src=”https://www.youtube.com/embed/Wcq5ceW1do8″ title=”YouTube video player” frameborder=”0″ allow=”accelerometer; autoplay; clipboard-write; encrypted-media; gyroscope; picture-in-picture” allowfullscreen></iframe>
Another option is to perform Warrior II with the left knee on the mat. But mind, you should watch out for the position of the neck and torso.
<iframe width=”560″ height=”315″ src=”https://www.youtube.com/embed/Zz8nCxXYlKw” title=”YouTube video player” frameborder=”0″ allow=”accelerometer; autoplay; clipboard-write; encrypted-media; gyroscope; picture-in-picture” allowfullscreen></iframe>
Common Mistakes

Wrong knee alignment
Many beginner students tend to push the knee of the bent leg too far forward. Thus, this creates excess tension in the knee joint and can result in injuries and strains.
Another issue is when the knee drops inside. So, mind rotating the thigh of the bent leg outwards and stabilize the knee position.
Arm drops too low
If hand and shoulder muscles are weak, it’s difficult to control the position of the arm. Usually, this relates to the arm which is behind your back, as it’s easier to track the position of the front arm.
So remember that you have two hands and keep them in one line. Use your attention to track body position and adjust the arm right as you notice if dropped down.