सालम्ब सर्वाङ्गासन
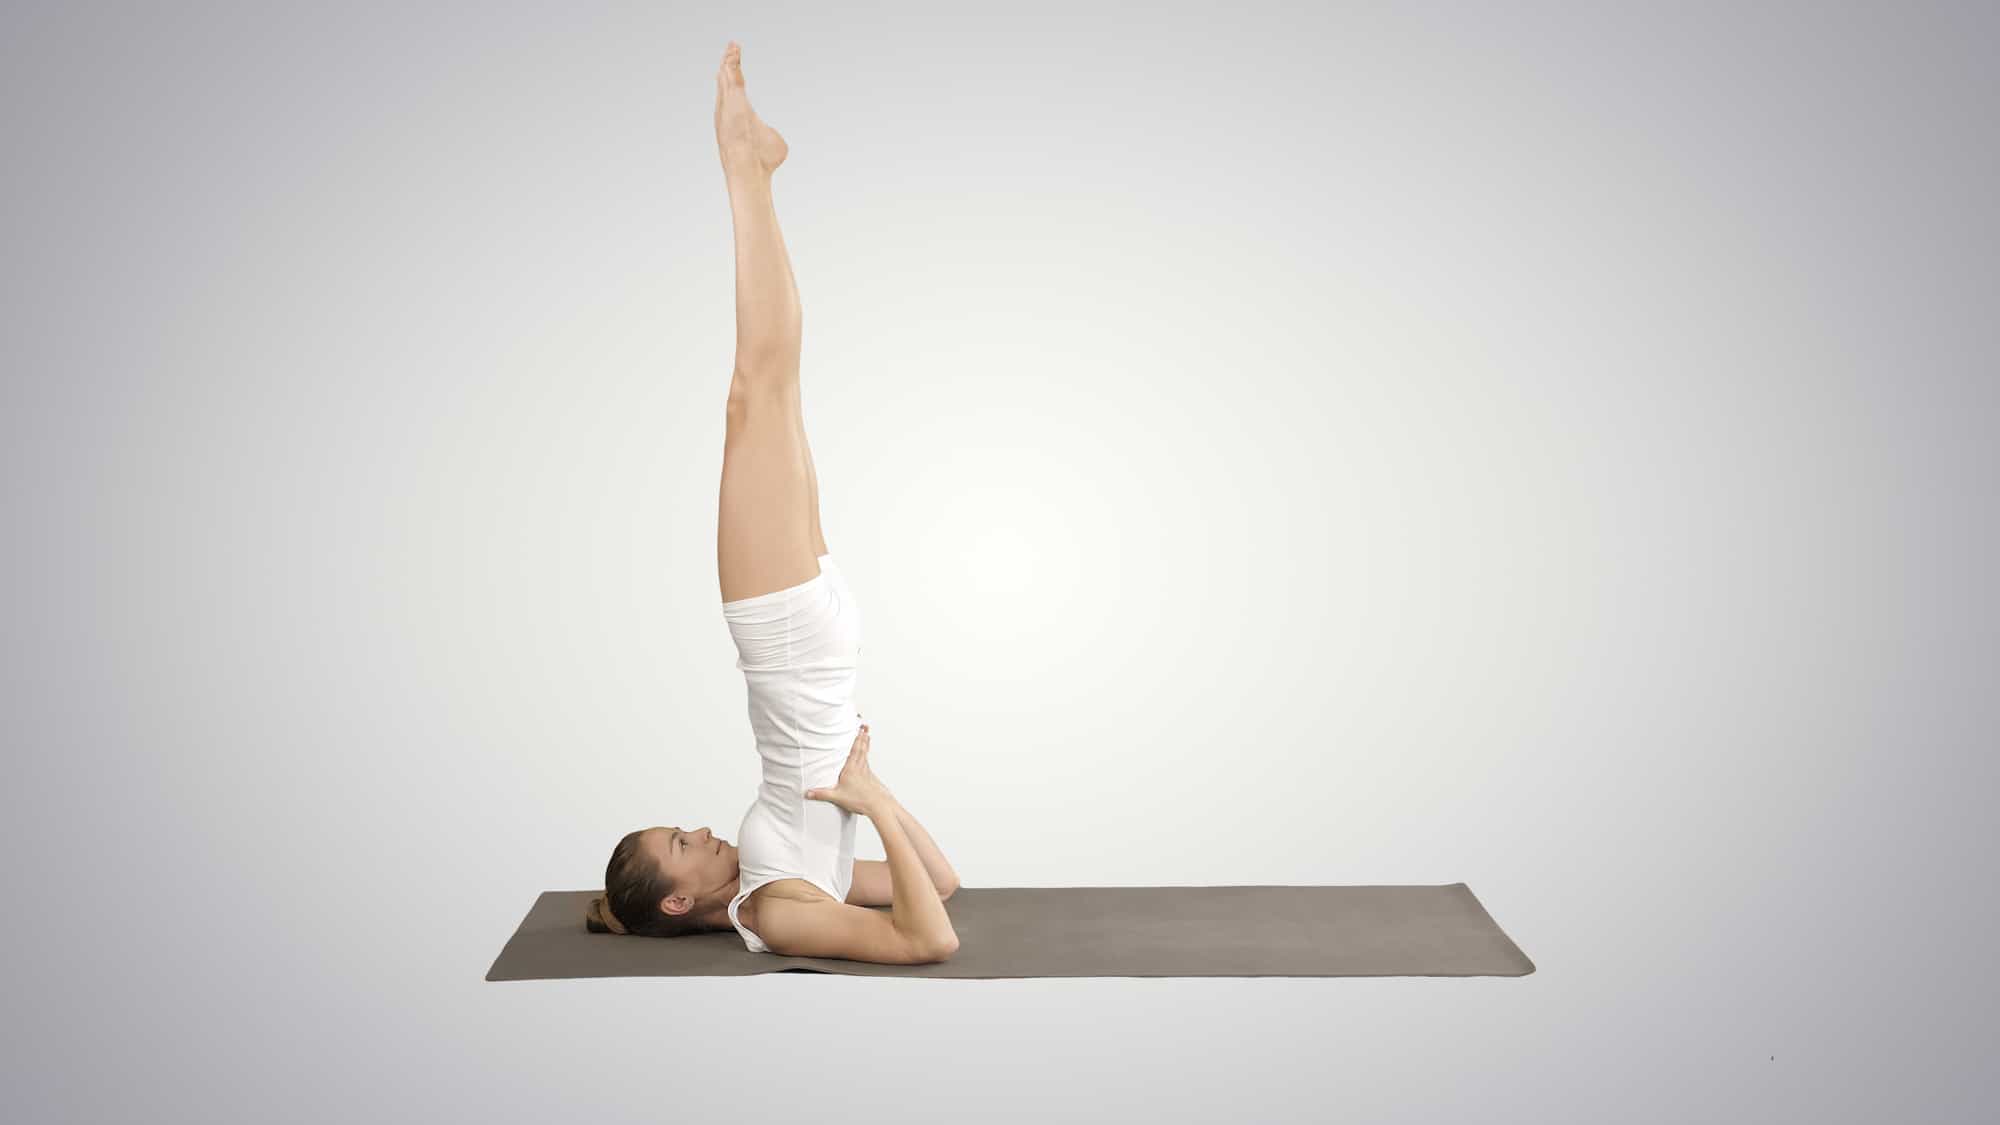
Salamba Sarvāṅgāsana: Salamba=supported, Sarvāṅga= all limbs or the whole body
How to Get Into It
- To start, lay down on the mat. Don’t rush and ground your back and shoulders; feel the surface with your back.
- Bend the knees and place soles on the hip-width on the mat. Put your palms down.
- Engage your abs and lift your legs. Keep raising until your lower back and hip are off the mat.
- Use your hands to support the torso. For this, put your palms on the lower back, fingers look towards the spine line, elbows bent and are parallel to each other laying on the mat.
- Engage core muscles more so that the torso goes perpendicular to the floor. You may slightly push the belly button towards your face. Keep going until you can lift the hips and keep the straight line formed by your spine and thighs. Then, start straightening your legs: both at a time or one by one.
- The neck and head should be in line with the spine. Save the space between your chin and chest and keep the neck long and parallel to the floor. Avoid turning your head to the sides. Relax the throat and face and keep breathing deeply and smoothly.
And one more thing: don’t put all the weight on the neck; your body should be pressed to the floor through the upper and middle parts of shoulder blades and NOT the neck. - Hold 5-20 breaths. If you practice yoga for a long time – hold the pose longer, up to 5 minutes.
Release the pose by softly putting your spine on the mat. For experienced yogis, you can dive into Halasana after the Shoulderstand by gently placing your toes behind your head.
Benefits
- The pose massages internal organs and thus stimulates digestion;
- Reduces tiredness (especially the variations with legs on the wall);
- Relieves from excess mucus;
- Improves sleep and reduces symptoms of menopause;
- It helps prevent varicose veins and blood stasis.
Precautions
Do not perform the pose if you experience any of the below conditions:
- Hypertension and cardiovascular diseases
- Headache
- Neck injuries
Women during their period should consider their overall condition and doctor’s advice if they want to practice this pose.
Modifications

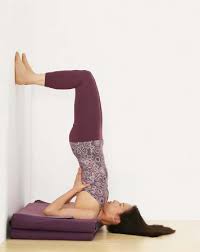
Beginners: Start mastering the pose next to the wall with your feet standing on the wall and bent knees. Take a blanket you can roll and place under your shoulders for support.
First, concentrate on engaging the core and keeping it perpendicular to the floor; soles are pressed to the wall.
Then learn to control the position with straight legs by keeping one leg on the wall and another – pointing into the ceiling.
To get out of the pose, settle your feet back on the wall and roll the torso on the mat.
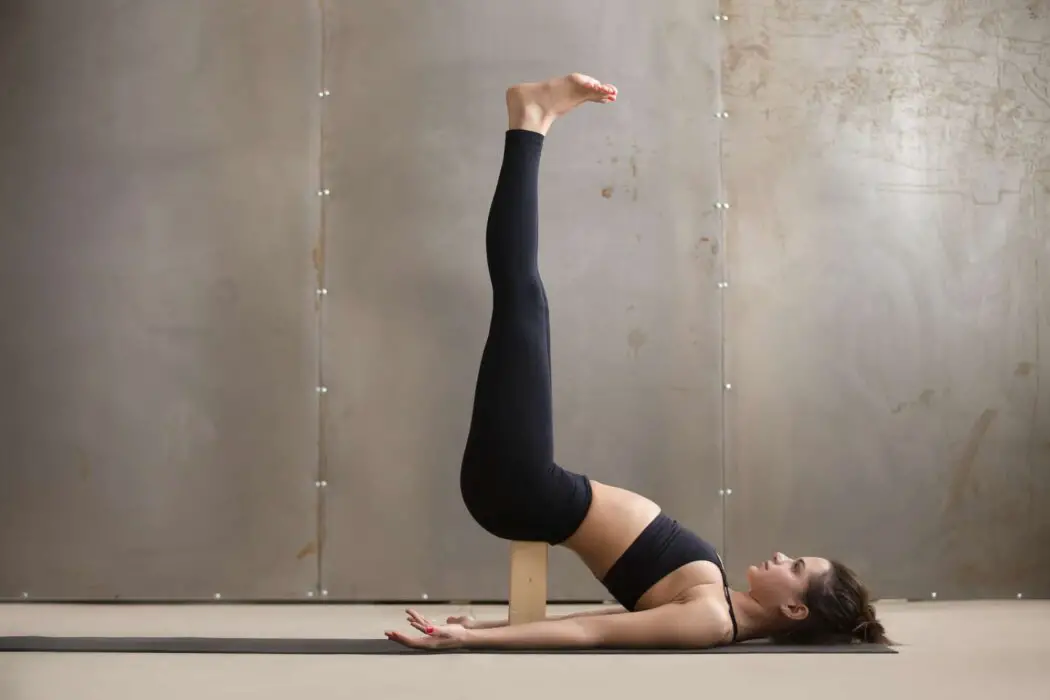
A block under your sacrum turns the pose into a restorative and resting one.

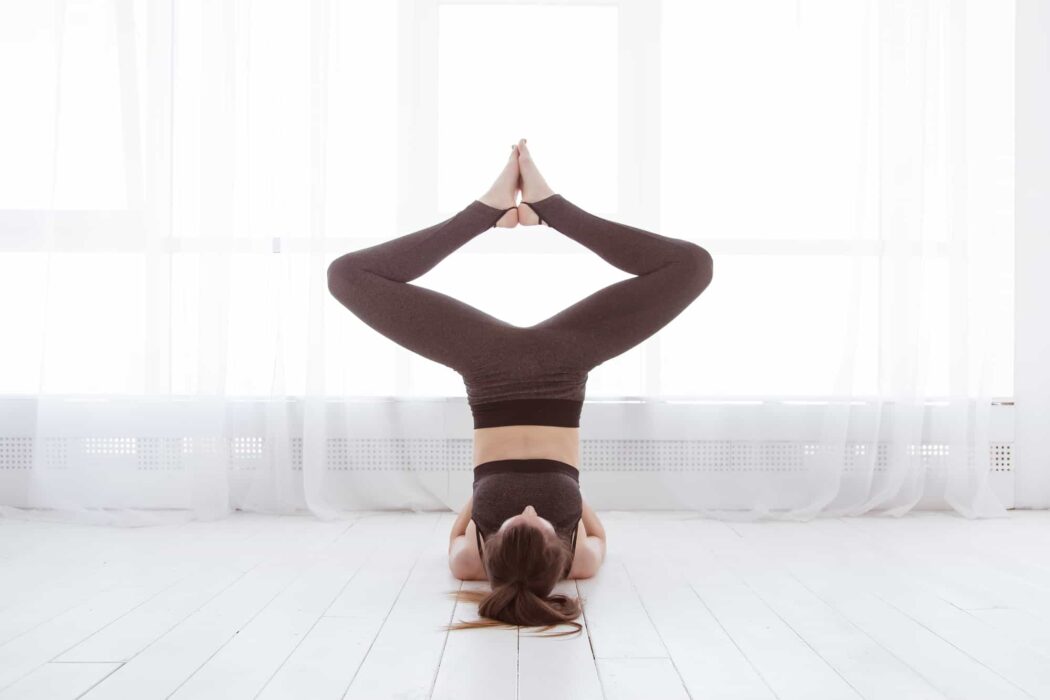
Advanced yogis: To move deeper, use various leg positions. For example, connect your soles for the upside-down Baddha Konasana, or put them in Lotus pose (if you already can this one while sitting), and so on.

Common Mistakes
Neck Position
Compression in the neck leads to bruising and injuries. Neck injuries are the most common ones caused by misalignment in inverted postures. So the best thing here is to maintain the proper angle between your chest and chin, between 90 and 110°.
Bridge Pose (Setu Bandha Sarvangasana)
Tip: Use a blanket to raise the shoulders and create more space for your neck. Also, instead of pulling chin to the chest, go in another direction and push chest closer to the chin, while keeping the neck relaxed on the floor.
Shoulders Not Aligned
Some beginner yogis focus too much on keeping the torso straight, so they overlook the position of their shoulder girdle. So before you invert, make sure your shoulders are properly grounded. Distribute the weight evenly between the points that support the body weight.
Hands Placement
Most students in the class have only index fingers pressed to the back as they hold the pose. Still, if you miss sharing the weight of your body between triceps, shoulder girdle, and wrists – you risk getting a wrist injury and\or pain.
How to correct it? Spread your finger wide and ensure your thumbs are facing the front of your body. Other fingers are pointing into the ceiling.
Divide the load equally for both hands and use fingers to push the ribcage a bit in and up. As your core becomes stronger – you can take palms off the back for a while and take a moment to root shoulder blades more. After this move, again put your palms on the back.