सेतु बन्ध सर्वाङ्गासन
Setu Bandha Sarvāṅgāsana
setu = bridge; bandha= lock; sarva = all, whole; anga = limb or body
If you want to prepare yourself for a backbend, this pose is the safest option to start. The Bridge pose is considered an upside-down (pelvis is higher than heart center) posture that has a rejuvenating effect on your body. Let’s see how you can perform it.
How to Get Into It
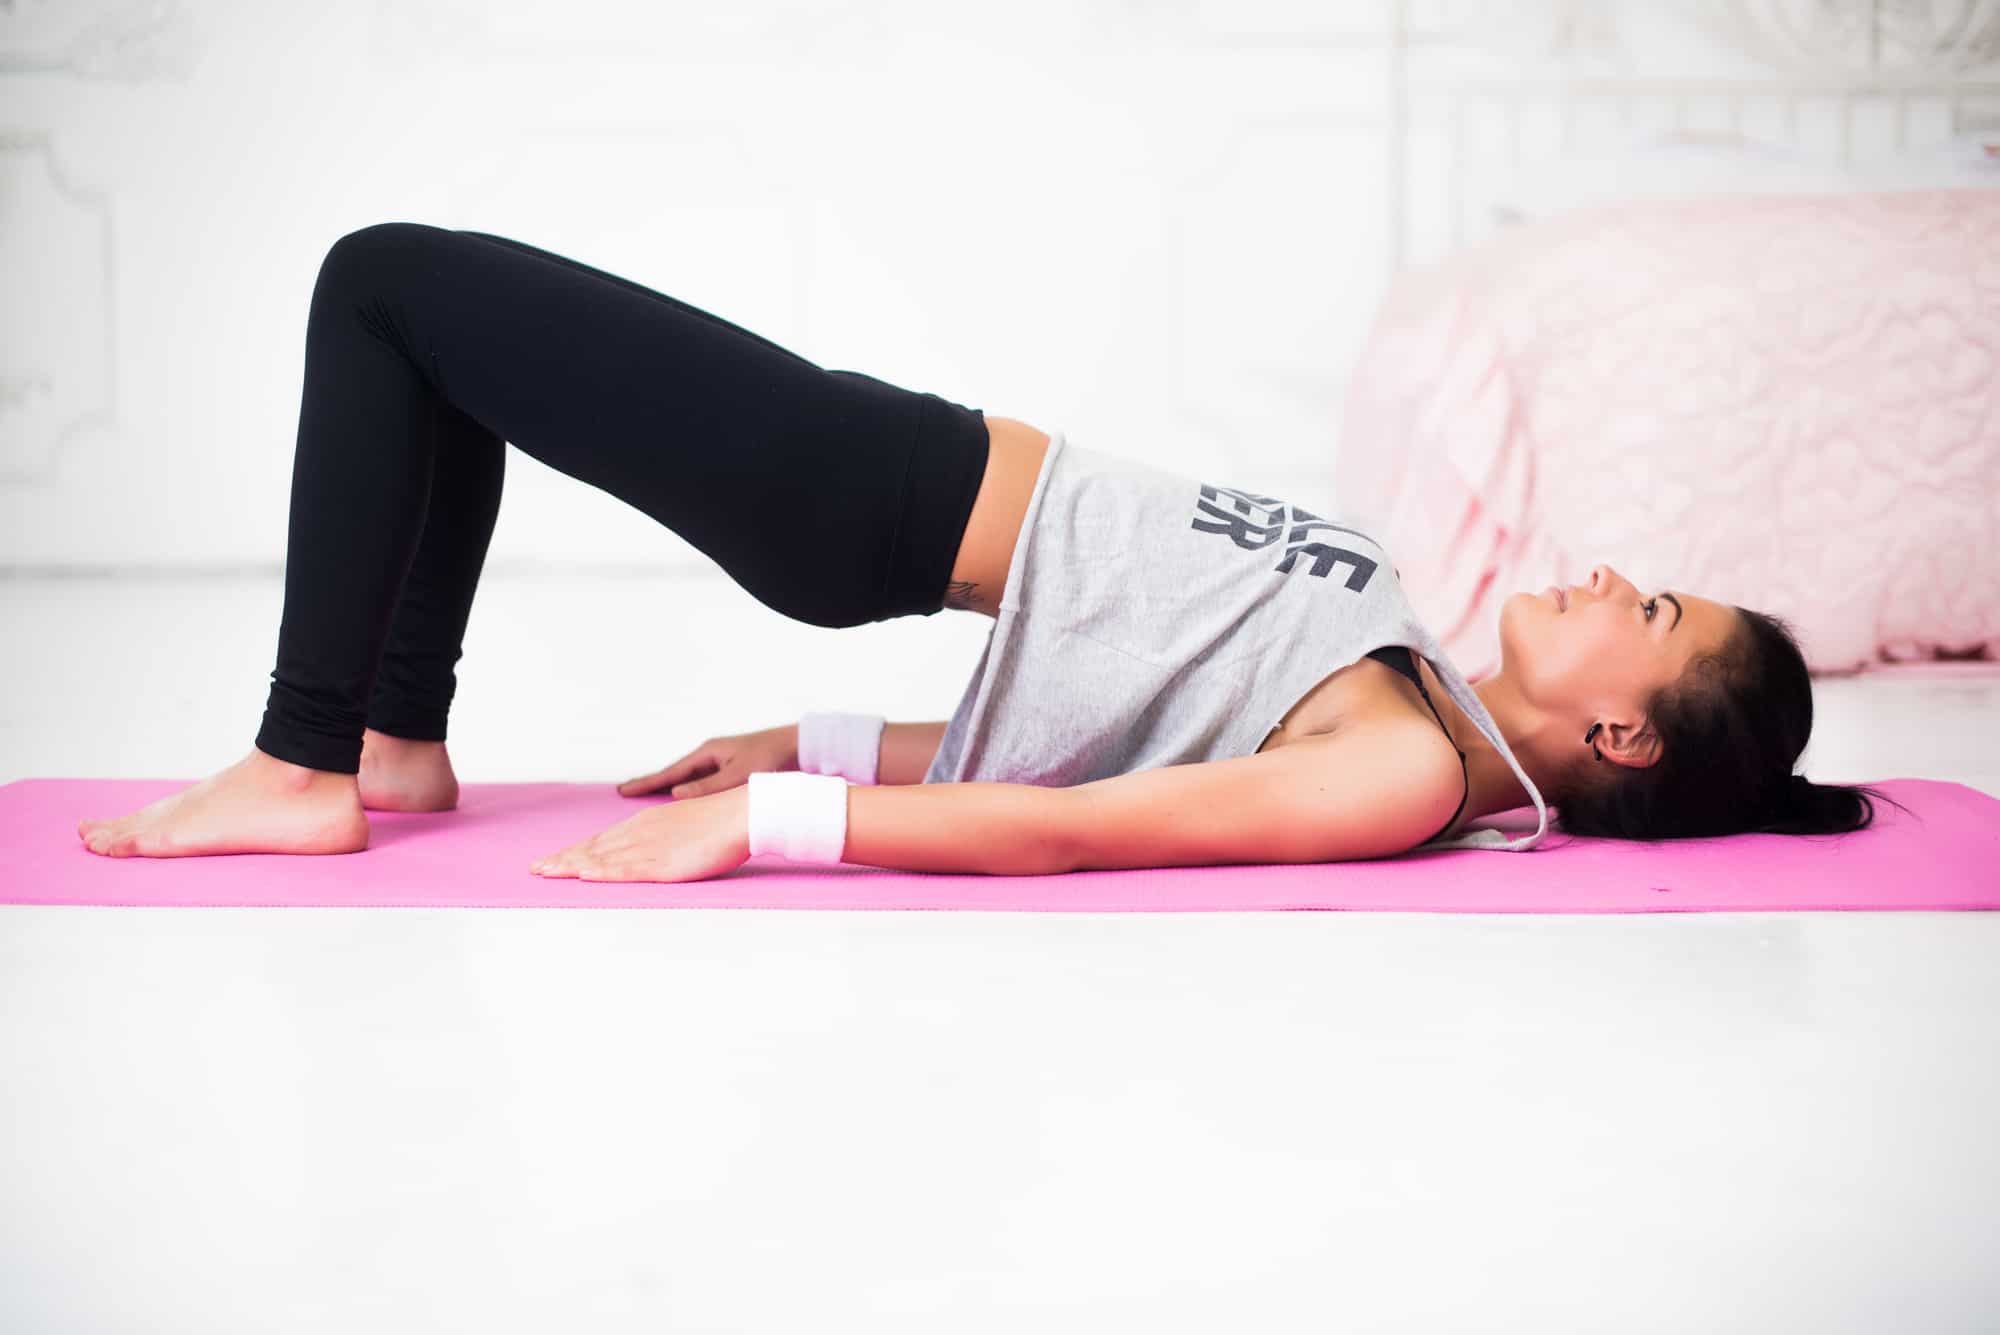
- Lie down on the mat. Bend your knees and place soles close to the sit bones – the closer, the better. Your feet are under your knees. Your hands are on the mat, too, palms facing down.
- Shoulders and neck are relaxed; keep your neck long without squeezing it with shoulders.
- Exhale and push your hips up. Engage glutes, tuck the tailbone, and ensure that you’re not keeping the body’s weight on your neck. Your glutes and legs are holding the position. Make sure your knees do not fall into the sides; instead, keep them closer to each other, but don’t press them together.
- Open your chest and pull shoulder blades towards each other, trying to lift them off the floor.
- You can keep your hands on the mat or put your hands underneath your back and hips, interlacing fingers. This helps to open the chest more and engage the upper back into the pose.
- Close your eyes and focus on your breath and feelings. Keep the position for 5-10 breaths and slowly put the hips down as you exhale in the end.
Benefits
- Improves digestion and metabolism
- Helps open the chest and adds to shoulder flexibility
- Strengthens hips, legs, and glutes
- Relieves menstrual pain (if you use a support under the sacrum)
- Helps improve sleep and sheds light and mild headache
- Prepares your back muscles for a deeper backend
Modifications
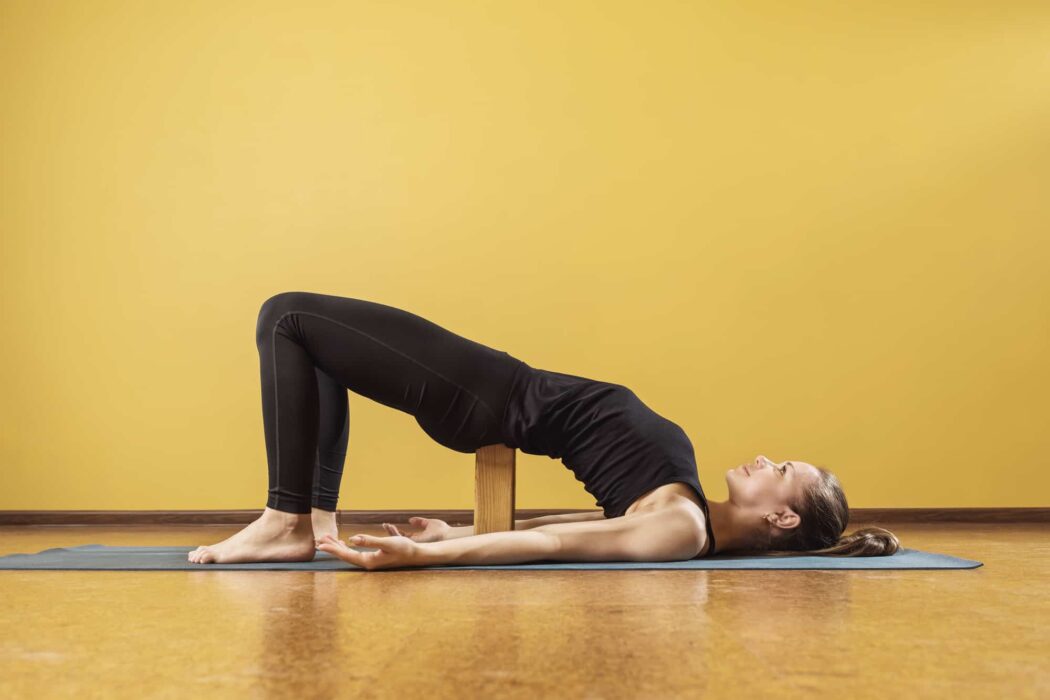
Beginner: To make your hip muscles work better – put a block between your thighs and squeeze it. Then lift your hips and go into the pose.
Place a block or a bolster under your sacrum (right above your tailbone) to relax and unwind in this pose. Allow your body weight to rest on the support.
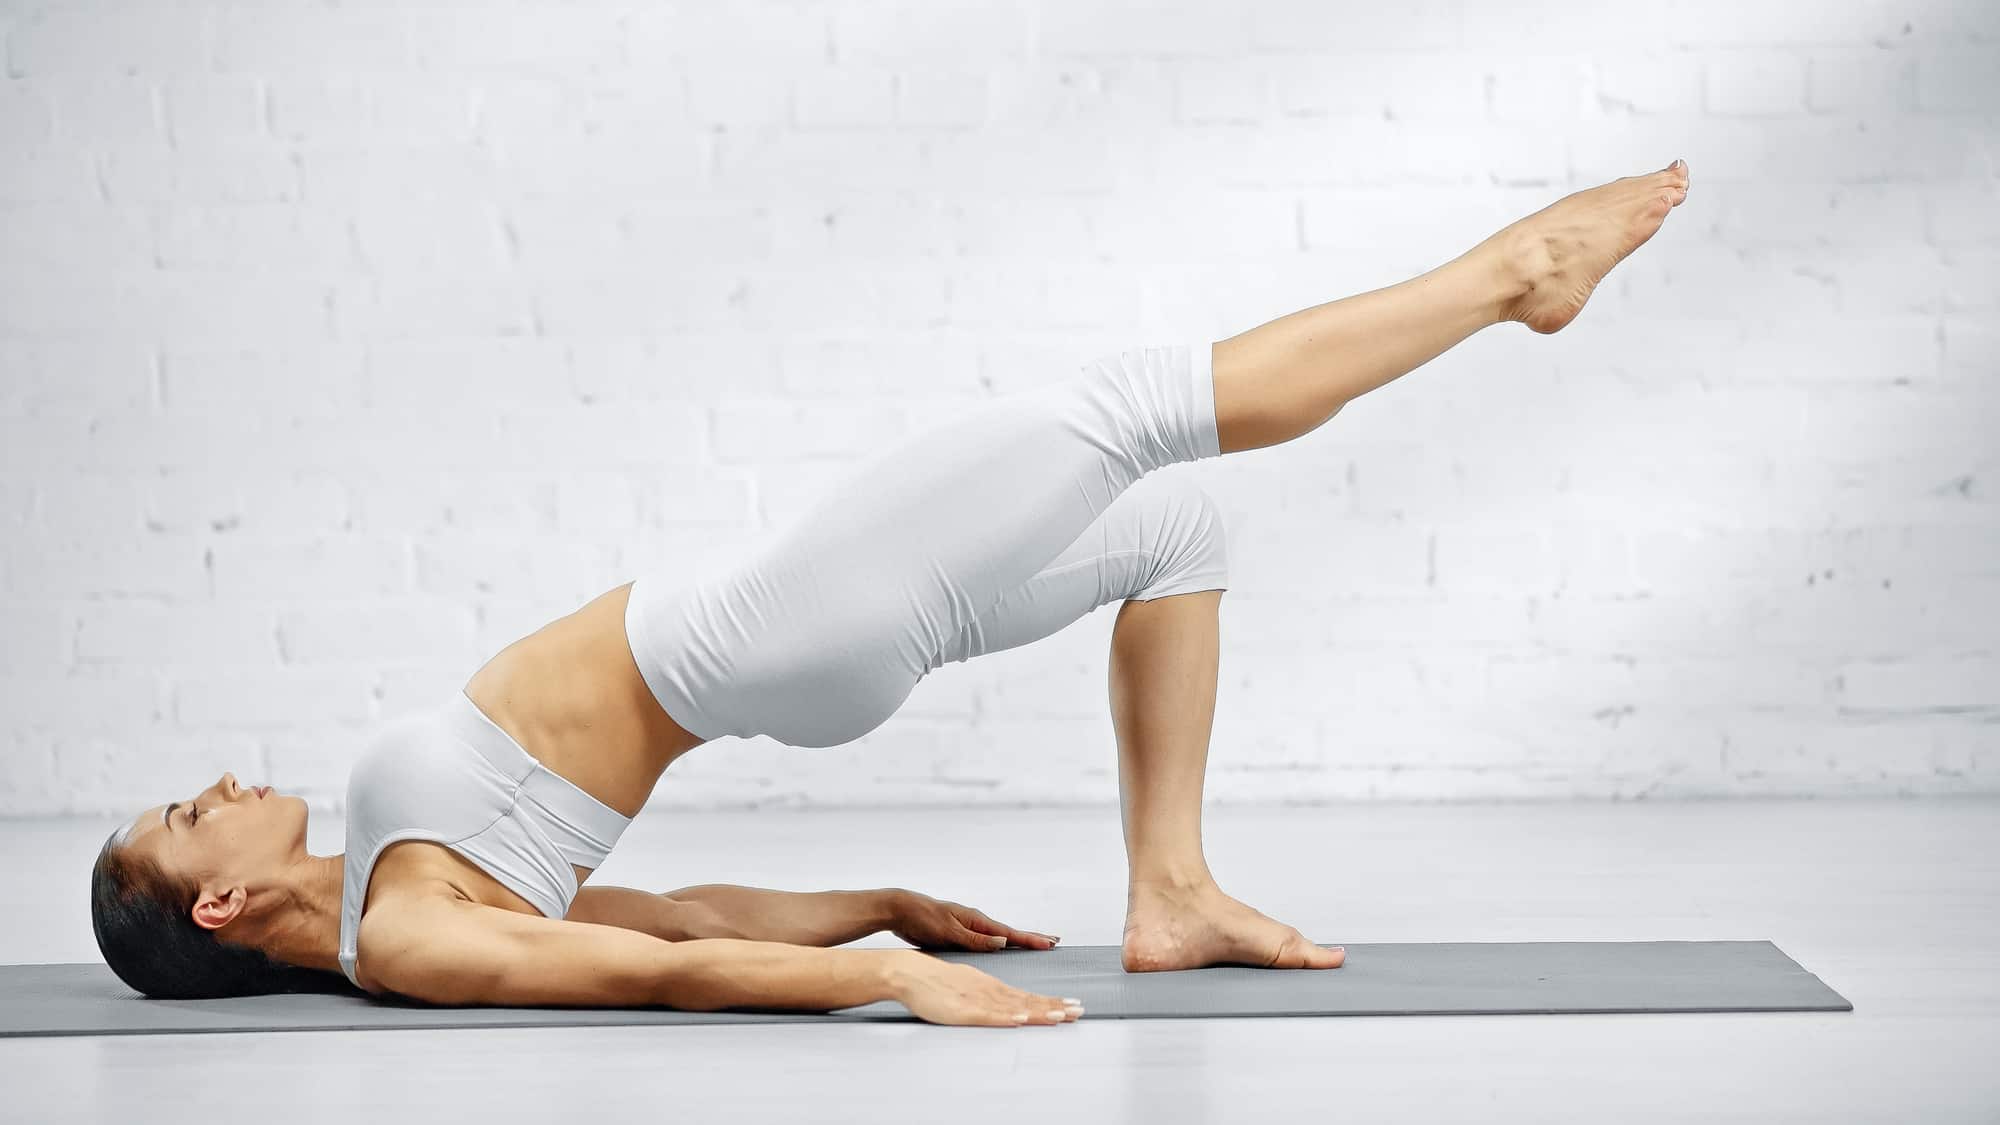
Advanced: As you are in the pose, straighten one leg. Add dynamic movements either with one leg up or when both feet are on the ground.
Precautions
Not recommended for those with shoulder or neck injuries. Some women prefer not to practice upside-down positions during their period.
While you are in the pose – don’t move your head to the left or right suddenly to prevent neck injury.
Common Mistakes
Squashed Neck
Check if you have some space between your chin and chest. You can use your palm – simply put your flat palm on the neck and see if all four fingers can fit in that space. This helps to lengthen your neck and prevent any neck injury.
Knees Fall Apart or Inward
Another common issue in this pose is that knees are not aligned properly. So the proper alignment is feet hip-width apart, knees facing up, and stay just above the soles.
3 Bridge Pose Variations to Spice up Your Practice
In the beginning, it’s hard to feel whether your feet are placed at the necessary distance from each other. So a good option is to start in a seated position and check visually if your feet are aligned. After that, you can lay down and lift your hips in the Bridge pose.
Wrists
Some tend to interlace fingers and place palms wide, so they press the outer palms’ sides to the mat. The right thing to do here is to keep your fingers interlaced, and palms pressed closely to each other. This prevents you from unnecessary strain in the wrists and helps stretch the shoulders and arms better.