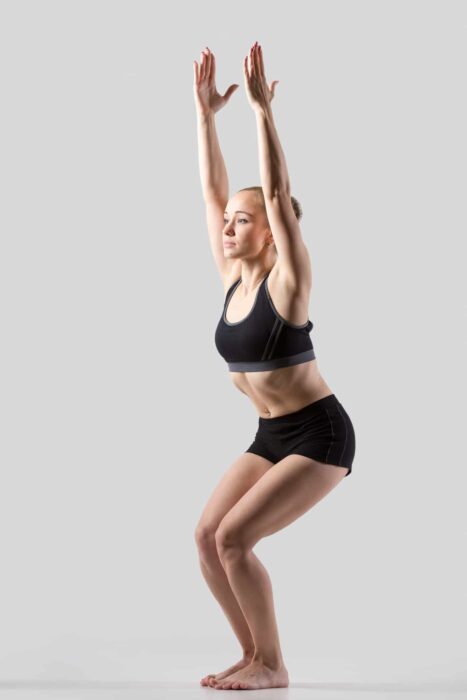
उत्कटासन
Utkata = powerful or fierce
Although the Utkatasana is usually called a Chair pose thanks to the form it resembles, the translation from Sanskrit has a different meaning.
How to Get Into It
- Begin in the Mountain pose. As you exhale, bend your knees and move your hips back as if you are sitting down on an invisible chair behind you.
- On the next inhale, lift your hands in front of you, palms facing each other. Relax your shoulders and release the neck. You can look in front of you.
- Stay for several breathing cycles. Keep reaching higher with your hands. At the same time, try to move hips lower.
- Watch the lower back. To prevent arching in that area, tilt your tailbone and engage the abdominal muscles to support the back.
- Make sure your knees don’t go forward above the toe’s line. To check if you do it correctly, simply look down to see your toes.
Benefits
- It strengthens your ankles and thighs, including inner thigh muscles;
- Improves knee stabilization and protect them from injuries;
- Opens up your shoulders;
- Breathing with arms above you helps take down the stiffness in the rib cage; thus your breathing patterns will change;
- You can also increase the lungs’ capacity.
Precautions
Pregnant women should use only hip-width soles position
Not recommended with a recent knee injury or surgery.
Modifications
Beginner: Normally, in tadasana, your soles are placed together, very close to each other. If you feel unstable like this, you can put your soles under your hips to make the form more stable.
If the pose seems challenging to you, you can split it into 2 parts and work on it separately until your body is ready to make it a unity.
First, prepare your thighs, knees, and ankles. Make sure you do a warm-up for your knee, hip, and ankle joints. With your back pressed to the wall, step away from it and bend your knees so that they are above your heels. Hold the position for 1-2 minutes. Keep your back straight and your knees pressed together. You may notice your thigh muscles are burning or your legs are shaking – that’s a good sign.
Second, prepare your shoulders, hands, and back. You may need to do some stretching for the shoulders and back strengthening sequences for a week or two.
After that, combine your lower and upper body in one asana.
Pro: To engage your thighs more, you can squeeze a towel or a block between them (make sure one side of the block fits between the knees). Add Mula Bandha to tone your pelvic floor in this pose.
Also, you lift your heels over the floor and stay on the balls of your feet.
Common Mistakes
Moving knees forward too much and shifting weight on the feet, balls, and toes can put more stress on your knee and result in knee pain. To avoid this, distribute the body weight evenly throughout the surface of your sole and press the heels to the floor more firmly.
Shallow breathing is another common mistake. Instead of short, tense breaths, try to make deep, longer inhalations to keep the breathing smooth.