- latissimus dorsi (middle back)
- rhomboids (between shoulder blades)
- trapezius (neck, shoulders, and upper back)
- biceps brachii (front of the upper arm)
The primary movers of this exercise are the lats and rhomboids; other muscles have a supportive function for the overs.
A strong back and arms improve your overall physical performance and act as a base for many compound and isolated exercises.
How to Do Seated Cable Row?
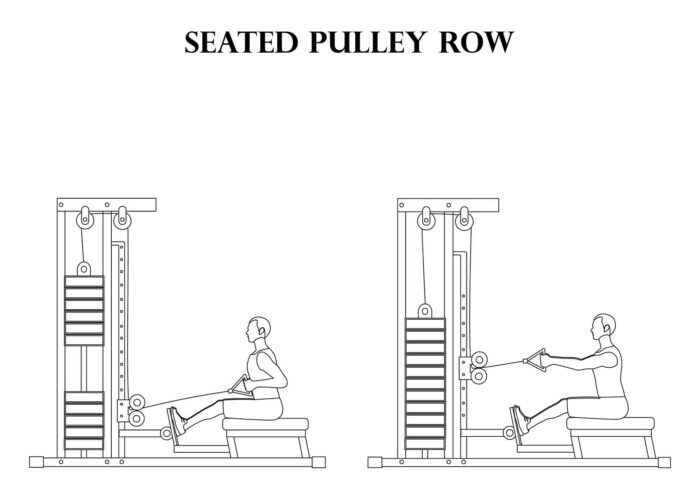
- First of all, adjust the cable weights and the pad to sit straight and comfortably.
- Sit on the bench, place your feet on pads, knees bent.
- Grab the handle and leave your arms extended.
- Squeeze your lats, pull your shoulder blades together, and down. Pull the handle toward your torso. Elbows go back. Your back should remain straight.
- Pause for a second and extends your arms to the starting position.
- One seated cable row rep is done!
Among the numerous benefits of a seated cable row are
- better posture
- stronger back and arms
- more effective upper body movements
- improved general upper body health
Safety Tips
Be careful to avoid the following mistakes to lower the chances of injury and improve the exercise’s effectiveness.
- Keeping straight knees. That’s a no! They should always be slightly bent. In all the alternative exercises as well.
- Rounded back. Your back should be straight at all times. When you pull, it’s essential to hold it strong and move only your arms. Pull with lats, not the whole torso.
- Wobbly elbows. In this exercise, your elbows should be firm and strong. Wobbly elbows with weight will result in injury.
- Jerking motions. Beginners should learn to have complete control over each movement, especially when dealing with weights. Thus, slow your motions a bit to keep the correct form.
At-home Versions
These seated cable row alternatives are all suitable for the home environment. We’ve already covered at-home dumbbell exercises btw; check them. They mostly use small equipment that can be stored somewhere in a corner, and many of us have. People can also do all of these exercises in gyms with professional equipment.
11 Best Upright Row Alternatives (Home and Gym Versions)
Dumbbell Bent-Over Row
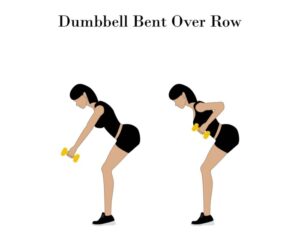
The first alternative is quite an affordable option for home training. For this exercise, you’ll need only dumbbells. And even if you don’t have them, any weights that you can securely hold will do. The advantage of this alternative lies in better muscle control. In addition, separate weights allow to load each side independently and balance out the discrepancies.
A bent-over row targets the same muscle group as a seated row does. Plus, it does also activate your core as mentioned in the 2015 study published in the International Journal of Sports Medicine.
How to Do
- Stand straight with dumbbells (weights) in your hands. Softly bend your knees.
- Hinge your hips slightly back and lower the torso to an angle of 35 – 45 degrees. Your back should be straight, neck in line with it as well. Let the weights hover over your feet.
- Pull the weights towards your core by bringing your elbows slightly up and back. Contract your lats and pinch your shoulders back.
- In a controlled option, return the weight back down.
Make sure that your back is engaged during the exercise alongside your arms.
Note: if you keep your elbows close to the abdomen, your lats are engaged more. It works better for your upper back if you flare them to the sides.
Barbell Bent-Over Row
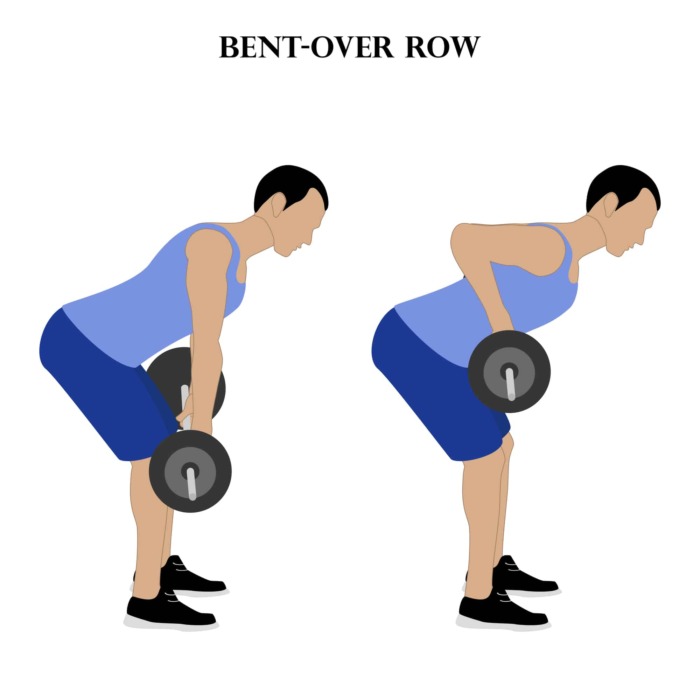
This alternative is similar to the one I’ve mentioned above but with one slight change – the barbell. However, it drastically changes two things. First, you can only practice it at home if you have a barbell; it can’t be replaced by bottles of water e.g. Second, it works muscles as a tandem – your dominant hand will subconsciously carry the weight for the weaker hand a bit.
Seated Forward Bend (Paschimottanasana)
Among the bonus benefits of such standing rows is the engagement of glues and legs to stabilize your posture.
How to Do
- Stand up, holding a barbell. Feet hip-width apart. Bend your knees slightly. (You can also hold the barbell in an underhand grip.)
- Hinge your hips slightly back and lower the torso to an angle of 35 – 45 degrees. Your back should be straight, neck in line with it as well. Let the barbell hover over your feet, arms perpendicular to the ground.
- Pull the weights towards your core, bringing your elbows slightly up and back. Remember to contract your lats and pinch your shoulders back as you do with barbell row.
Note: this is an exercise that requires a slight bend of your back. Another alternative with a slightly different posture is recommended as an advanced alternative. More on it in a second.
Pendlay Rows
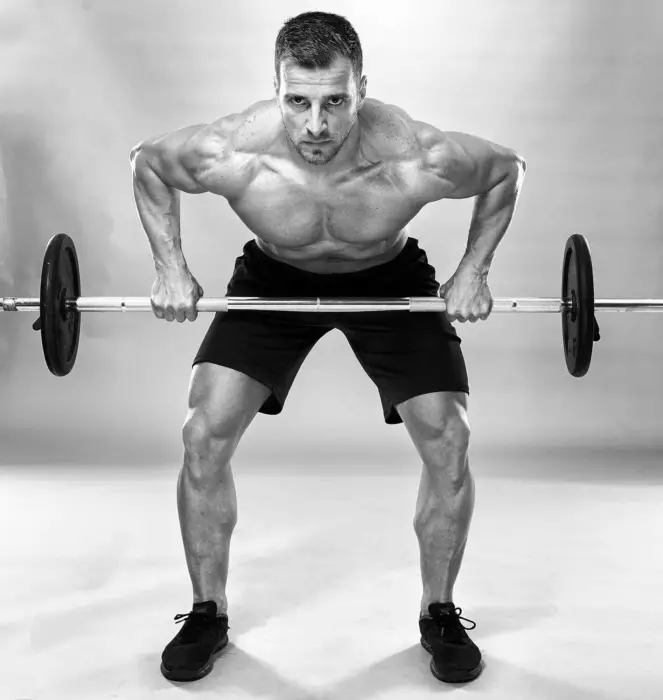
This is a trendy alternative to the seated row, very similar to the barbell row, but with an inclination towards a deadlift posture.
The name of this exercise comes from its creator, weightlifting coach Glenn Pendlay.
This row targets not only the upper back but also the lower back and the posterior chain as a whole.
How to Do
- Stand straight with the barbell in a wider-then-shoulders grip (overhand). Feet shoulder-width apart. Knees slightly bent.
- Hinge your hips slightly back and lower the torso to an angle of 90 degrees. Your torso shouldn’t raise higher than 45 degrees throughout the whole exercise. Better stay parallel. The barbell should be touching the floor.
- Brace your core and lift the weight up to your abdomen; elbows go up. Squeeze your shoulders together.
- Slowly lower the barbell to the floor.
Note: this is an advanced exercise that is not meant for beginners. If you are still a “fresh athlete,” you better stick to the regular barbell row.
Landmine Row
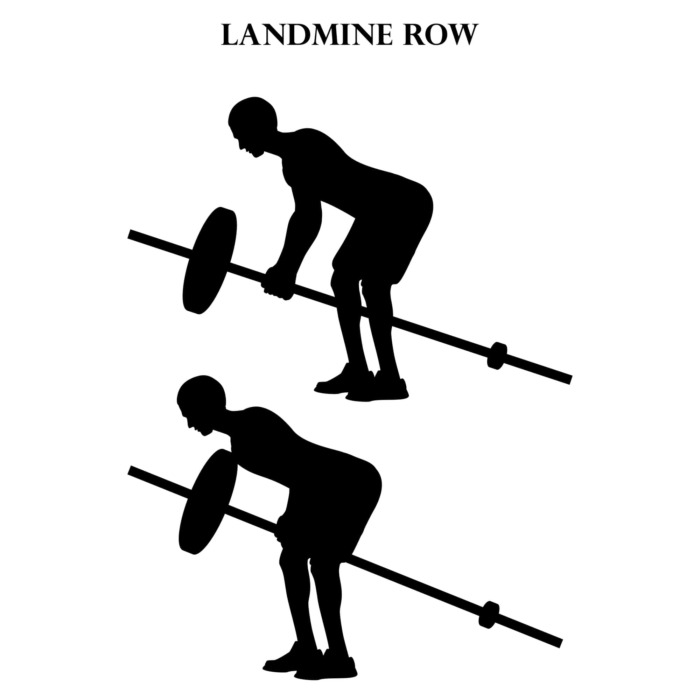
This is an exercise that can be done both at home and in the gym. You’ll need a barbell and weights for one of its sides at home. At the gym, find the landline stand and put the required weights.
How to Do
- Place the empty end of your barbell in a corner. Ensure it’s held down by some weight, e.g., by placing a dumbbell on top.
- “Straddle” the weighted end of the barbell/. Knees slightly bent.
- Bent over at your hips and lower your torso to 45 degrees. If
- Either hook a V-grip handle under the bar or take it just with bare hands. Before the weights.
- Keep your back straight and pull the weights towards your chest. Elbows go back, shoulder blades pinched.
- Lower the bar until you feel a deep stretch in your back.
Note: You can also perform this exercise on a single-arm by standing beside the bar instead of “straddling” it. But it’s not recommended for beginners, only intermediate and advanced athletes.
11 Best Dumbbell Exercises for Lats: All Levels
Inverted Row
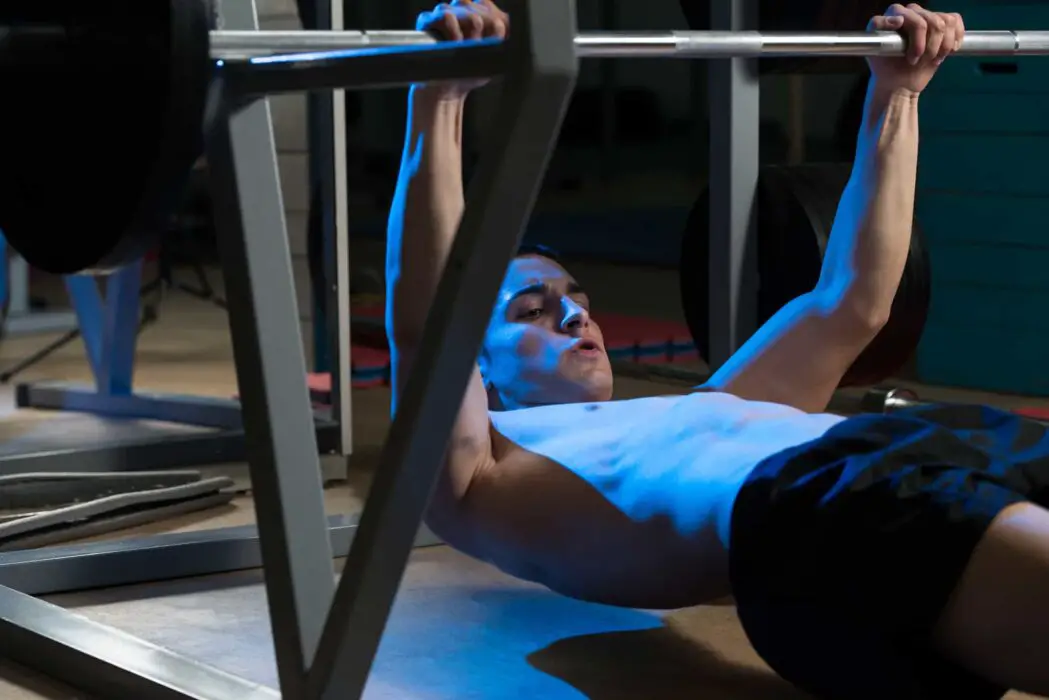
This seated row alternative is also known as the Australian pull-up, which suits the exercise better, in my opinion. The pun of its second name comes from an athlete being “down under” the bar.
This pull-up/row exercise is excellent for beginners who still don’t have enough muscle strength for regular pull-ups. In addition to the upper back engagement, it also provides better lower body participation. Plus, it’s a great beginner exercise for improving grip strength.
This inverted row at home is not an easy to do exercise, but you can find proper bars in parks and some apartment complexes.
How to Do
- Stan in front of any low bar, squat rack, or Smith machine. Recommended somewhere around waist height.
- Get under the bar. Lie n your back with the bar being above your upper chest.
- Extend your arms to the bar and grab it with an overhand grip. Slightly wider than shoulder-width apart.
- As your arms are fully extended, your back should hover above the ground. The only point of contact with the floor – is your feet. Strong and engaged feet and legs!
- Tighten your core and glutes to keep your whole body straight. Pull your chest up to the bar but not touch it. Make sure to keep your whole body straight.
- At the top, make sure your shoulders are retracted and hold for a moment.
- Lower until your arms are fully extended.
Note: this exercise is recommended for beginners; how can ease it even more – the higher the bar, the easier it is to pull up. This exercise requires your whole body to be engaged and strong.
Seated Band Row
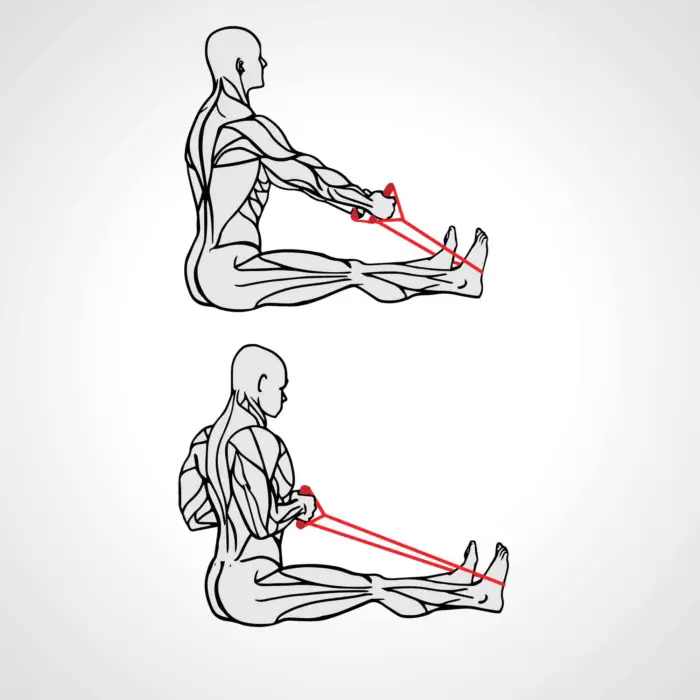
This alternative is the easiest to recreate at home. Even if you don’t have a heavy dumbbell, chances are you have a couple of bands that can be used in all sorts of exercises.
This version of a seated row uses bands instead of cables and mimics the movement perfectly. It engages the same muscles as well.
How to Do
- Sit on the floor with legs extended forwards, and knees slightly bent. Find a place before a pole or any sturdy surface where you can secure your band. Alternatively, hold the band down with your feet if nothing else is available. (In this case, it’s better to switch to a standing band row that mimics a bent-over row.)
- Secure one end of the band and grip the other.
- Pull your hands to your sides; elbows go back. The movement is identical to a seated cable row.
- Squeeze your lats and pinch shoulder blades together.
- Slowly extend your arms to the starting position.
Note: Bans can be used to mimic both seated and standing rows with the perfect analogy to using cables. Plus, this is probably the cheapest alternative on the list.
Gym Versions
This section enlists the slightly advanced seated cable row exercise alternatives that require gym equipment. Beginners can also practice them but with specialized benches and machines.
Standing One-Arm Cable Rows
If you are in a gym with a cable stand (literally any decent gym!), you can switch between different types of cable rows for better muscle engagement. No need to stick to the seated one. E.g. this standing one-arm cable row exercise is a compound exercise that targets large muscle groups with an ability to regular each arm’s load. Plus, studies have shown that both seating and standing cable row versions are suitable for functional strength training for all ages and fitness levels.
11 Best Butt Exercises to Do at Home
With it being a single arm cable row, you’ll be surprised how little you need to feel your back working.
How to Do
- Stand in front of the cable pulley machine and grab a D-handle grip. Set the height just below your chest.
- Move a bit backward until your extended arm feels a bit of tension.
- Bend your knees slightly and stand the shoulder-width apart. Make a bit of room between your bicep and lats.
- Pull the needle towards your chest, elbows back. Squeeze your lats and shoulder blades.
Note: At the end of the pull, rotate your hand (similar to an overhand grip) a bit to engage your arms better.
Seal Row
This exercise can be technically done at home as well, but a few of us have a straight study bench, as you see in gyms. Professional gyms also have a prone row bench perfect for the task and even the specialized seal row barbell with handles. However, this exercise can be done simply with a straight bend and weights (both barbell and dumbbell can be used.)
A seal row eliminates momentum, making the load on your back and arms even more challenging.
How to Do
- Select a high straight bench or put any bench on step boxes to elevate it.
- Lie face down on the bench.
- Grip your weights (wider than shoulder width for the barbell).
- Pul the weight up to your torso as you would with the simple row. Squeeze shoulder blades and lats.
- Lower the weights to the starting position.
Note: For this exercise, get a somewhat lighter weight than you do for a standard row. This is all pure muscle strength – no momentum makes the exercise more challenging.
Inverted TRX Row
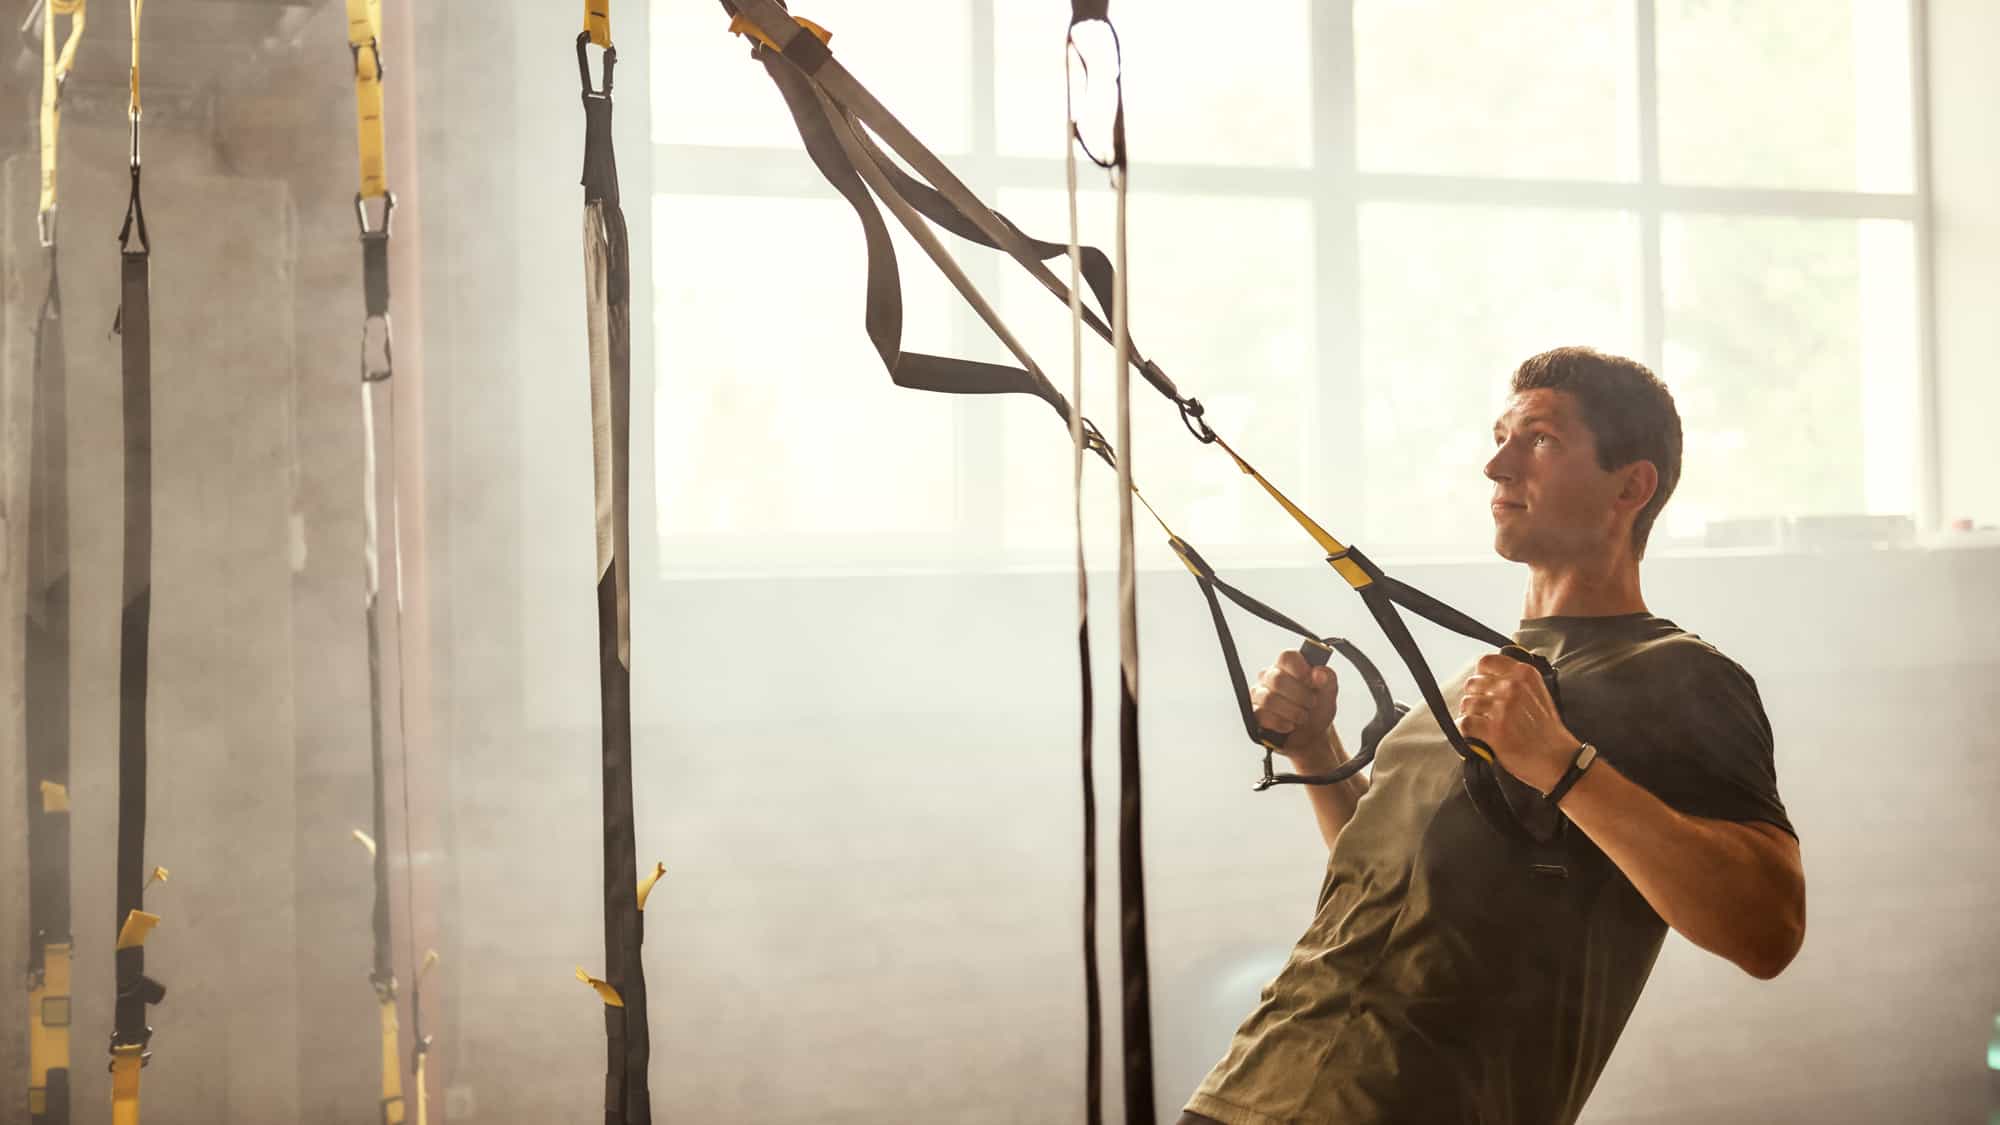
Now, you need a pro gym with a TRX stand for this exercise. It may be the most “hard to find” equipment for these alternatives, but the TRX is really worth it after all.
Although this is technically a bodyweight exercise, and we’ve covered many weighted versions, TRX will probably be the hardest. Just try it once, and you’ll know the power of TRX.
How to Do
- Set the TRX handles at the level with your torso.
- Grab the handle firmly and “fall” backward on extended arms. So you are hanging on the TRX.
- Your body should be in a straight line.
- Squeeze your core and lats and pull your torso up. At the top, pinch your shoulders.
- Lower back down.
Note: this alternative is similar to the Australian pull-up/inverted row. Thus, you can use them interchangeably, judging by the equipment you’ve got at hand.
11 Benefits of Pull-Ups You Could Be Missing Out On
Chest-Supported Row Machine
This rows exercise alternative may also miss your attention, depending on whether your gym has a chest-supported row machine. Many do have it, but not all.
The exercise also targets the following muscles:
- Latissimus dorsi
- Trapezius
- Rhomboids
- Biceps
By providing chest support, this exercise eliminates the weak links, allows heavier weights, and loads the targeted muscles better.
How to Do
- Take a seat on a row machine. Adjust the pad, so your chest rests on it. Make sure the angle is again 30 – 45 degrees
- Grab the machine’s handles with an overhand grip.
- Move the handles towards your chest. Elbows go back, shoulder blades squeeze.
- Extend your arms and move the handles back, do not release them.
Note: You can also replace the specialized row machine with an incline bench that you can set up for 30 – 45 degrees and rest your chest, so your body remains straight.
T-Bar Row

A T-Bar Row can be performed both at the gym (on a T-Bar machine) and at home. First, let’s discuss the home versions; later, you can recreate the same movements at the gym.
This exercise is more targeted at the middle back, lats, rear delts, and traps.
Do it at a landmine unit or a Tbar machine with wide handles in the gym. At home, just leave the weight on one side of the barbell.
How to Do
- Place the empty end of your barbell in a corner. Ensure it’s held down by some weight, e.g., by placing a dumbbell on top. Skip this step with a Tbar machine.
- “Straddle” the weighted end of the barbell/Tbar handles. Knees slightly bent.
- Bent over at your hips and lower your torso to 45 degrees. If it’s a chest-supported Tbar, just rest your torso on the pad, so you form a straight line.
- Either hook a V-grip handle under the bar or take it just with bare hands. Before the weights.
- Keep your back straight and pull the weights towards your chest. Elbows go back, shoulder blades pinched.
- Lower the bar until you feel a deep stretch in your back.
Note: There is also a single-arm T-Bar row alternative that provides better isolation but is also an advanced exercise not recommended for beginners.
In Conclusion
Among these eleven alternatives to a seated cable row, some exercises are better suited for beginners. Also, other exercises should be done by advanced athletes only. The latter mostly include gym versions. However, you should be careful at home during all beginner alternatives as well. Keeping the proper form and using appropriate weights should be rule number one.
Do Hanging Ab Straps Work? How to Choose and Use Them
All in all, this is an extensive set of alternative exercises for any equipment you can imagine. Judging by what you have at hand, you can choose an exercise or two from the least to properly strengthen your back.
Sources:
- Ronai, Peter M.S., FACSM, ACSM-RCEP, ACSM-CEP, ACSM-EP, EIM III, CSCS Do It Right: The Seated Cable Row Exercise, ACSM’s Health & Fitness Journal: 7/8 2019 – Volume 23 – Issue 4 – p 32-37 doi: 10.1249/FIT.0000000000000492
- A. Saeterbakken , V. Andersen , A. Brudeseth , H. Lund , M. S. Fimland. The Effect of Performing Bi- and Unilateral Row Exercises on Core Muscle Activation. (International Journal of Sports Medicine 2015; 36(11): 900-905DOI: 10.1055/s-0034-1398646)
- Anoop Balachandran, Maria M. Martins, Frederico G. De Faveri, Ozgur Alan, Funda Cetinkaya, Joseph F. Signorile,
Functional strength training: Seated machine vs standing cable training to improve physical function in elderly (Experimental Gerontology, Volume 82, 2016, p. 131-138, ISSN 0531-5565, doi.org/10.1016/j.exger.2016.06.012.)
 Fact checked by